Why Go Schluter?
- Lightweight, prefabricated, and pre-sloped—great for Ottawa’s diverse home types. No messy mud bed needed.
- Built-in waterproofing throughout reduces risk of leaks and mold—especially important in our wet, cold climate.
1. Prep Your Base
- Ensure the subfloor (plywood or concrete) is clean, dry, level, and structurally solid. Reinforce if needed. Knowledge Center
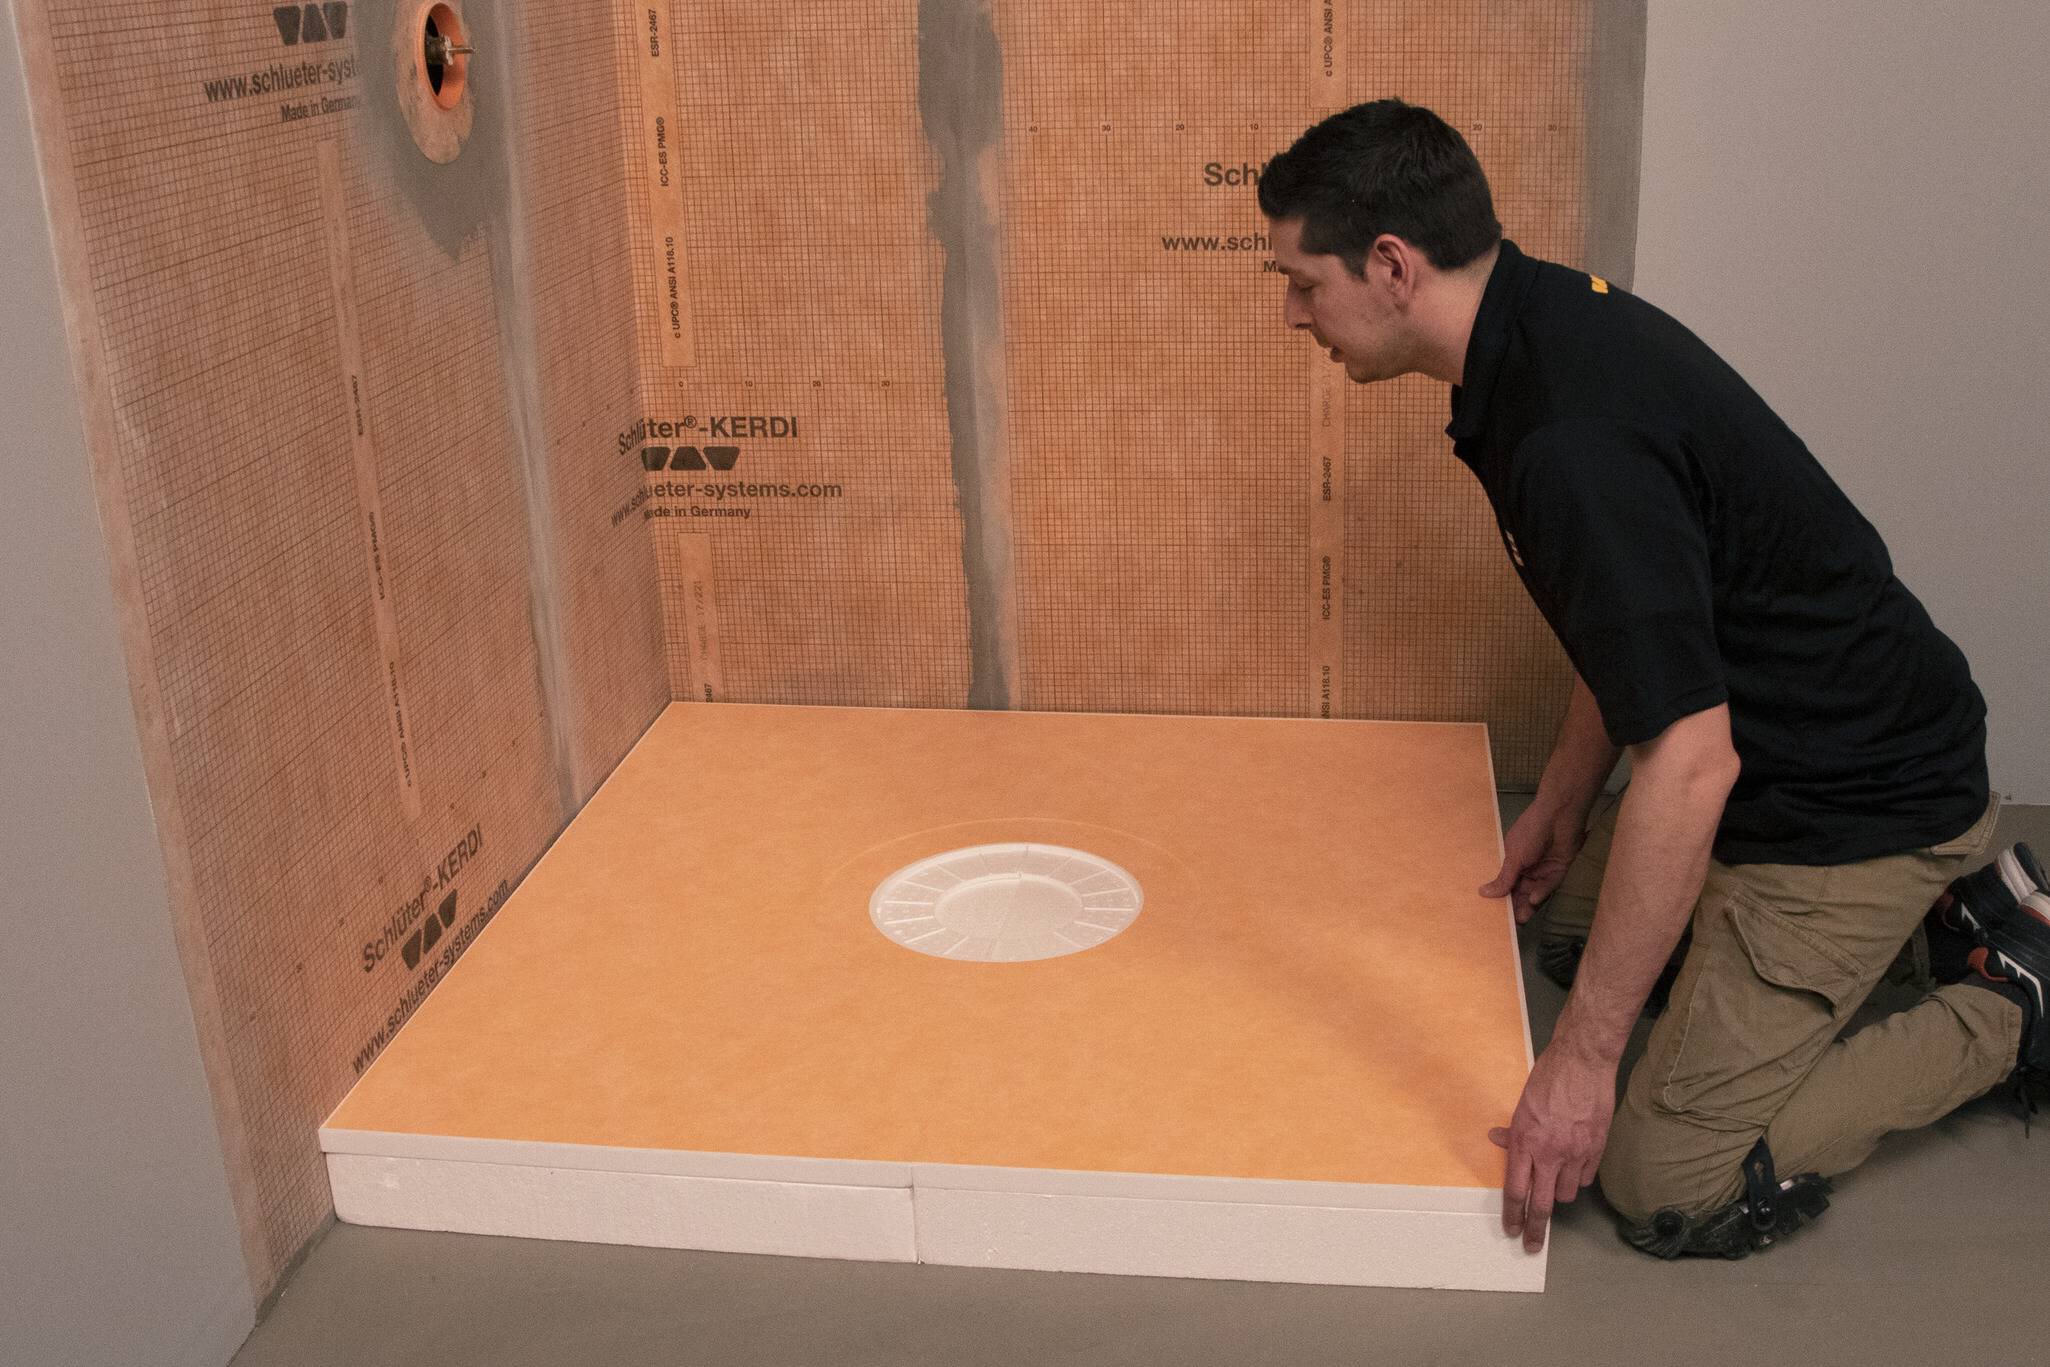
2. Dry Fit First
- Position the Schluter tray to check fit and confirm drain alignment with your plumbing. Trim the foam tray if needed—Schluter trays are cuttable.
- Pro tip: Keep ¾″ trim strips for perimeter use after adjusting size.
3. Install the Drain Assembly
- Apply unmodified thin-set mortar where the drain will sit.
- Press the Kerdi-Drain flange firmly and level it. Connect it securely to your existing plumbing. Knowledge Centerassets.schluter.com
4. Set the Shower Tray
- Spread unmodified thin-set across the subfloor; press the tray firmly into place.
- Level the tray, ensuring proper slope toward the drain. Knowledge CenterShunTool
5. Waterproof Walls, Curbs & Corners
- Install the curb (e.g. Kerdi-Board-SC) on mortar, then waterproof:
- Seal seams with Kerdi-Band, overlap at least 2″.
- Use prefabricated Kerdi corners for inside/outside transitions.
- Seal pipe penetrations with Kerdi-Seal.
6. Optional Features
- Install niches, benches, or other accessories—embed in thin-set and seal all edges with band/corners for full waterproofing. Knowledge Center
7. Curing & Optional Flood Testing
- Allow mortar to cure fully (usually 24–48 hours).
- Consider a flood test: fill with water and monitor for leaks before proceeding.
8. Tile Installation
- Use unmodified thin-set to adhere tiles directly to the tray and walls.
- Start from the floor upward—smaller tiles help maintain slope to the drain. NW Tile Supply
Quick Reference Table
| Step | Action | Why It Matters |
|---|---|---|
| 1 | Prep subfloor | Ensures stability and prevents deflection |
| 2 | Dry fit tray | Confirms fit and drain alignment |
| 3 | Install drain | Creates correct watertight connection |
| 4 | Set tray | Provides proper slope and support |
| 5 | Waterproof walls & edges | Guarantees a seamless, leak-free assembly |
| 6 | Add features | Customizes layout while maintaining waterproofing |
| 7 | Cure + test | Avoids damage and ensures integrity |
| 8 | Tile | Completes durable, waterproof finish |
Why This Works for DIYers in Ottawa
- Easy to handle foam tray vs. heavy mud installation.
- Reliable waterproofing—critical in our high-moisture winters.
- Durable, long-lasting, and compatible with various tile options—allowing customization for homes across Orléans, Kanata, Barrhaven, and Arnprior.